こんにちは。
SDNシリーズの三回目です。
一回目(SDNのビジネスアプリケーションでの利用方法について)は、SDNとは何なのかを簡単な応用例を示して説明しました。
また前回(SDN/OpenDaylightについて~簡単な説明とテスト環境セットアップ~)は、OpenDaylightとのインストールと、MininetのセットアップおよびOpenDaylightへの接続と疎通確認まで実施しました。
今回はこのサイトを参考にして、OpenDaylightのControllerアプリケーションを作成してOpenDaylightに組み込み、そのアプリケーションでMininetの仮想ネットワークデバイスを制御する実験をしてみます。
実施環境は以下の通りです。
コントローラー(OpenDaylight)ホスト:CentOS6.2
Mininet ホスト:Ubuntu 13.10
いずれもMacOSX 10.9.2 VirtualBox 4.3.10上で動作しています。
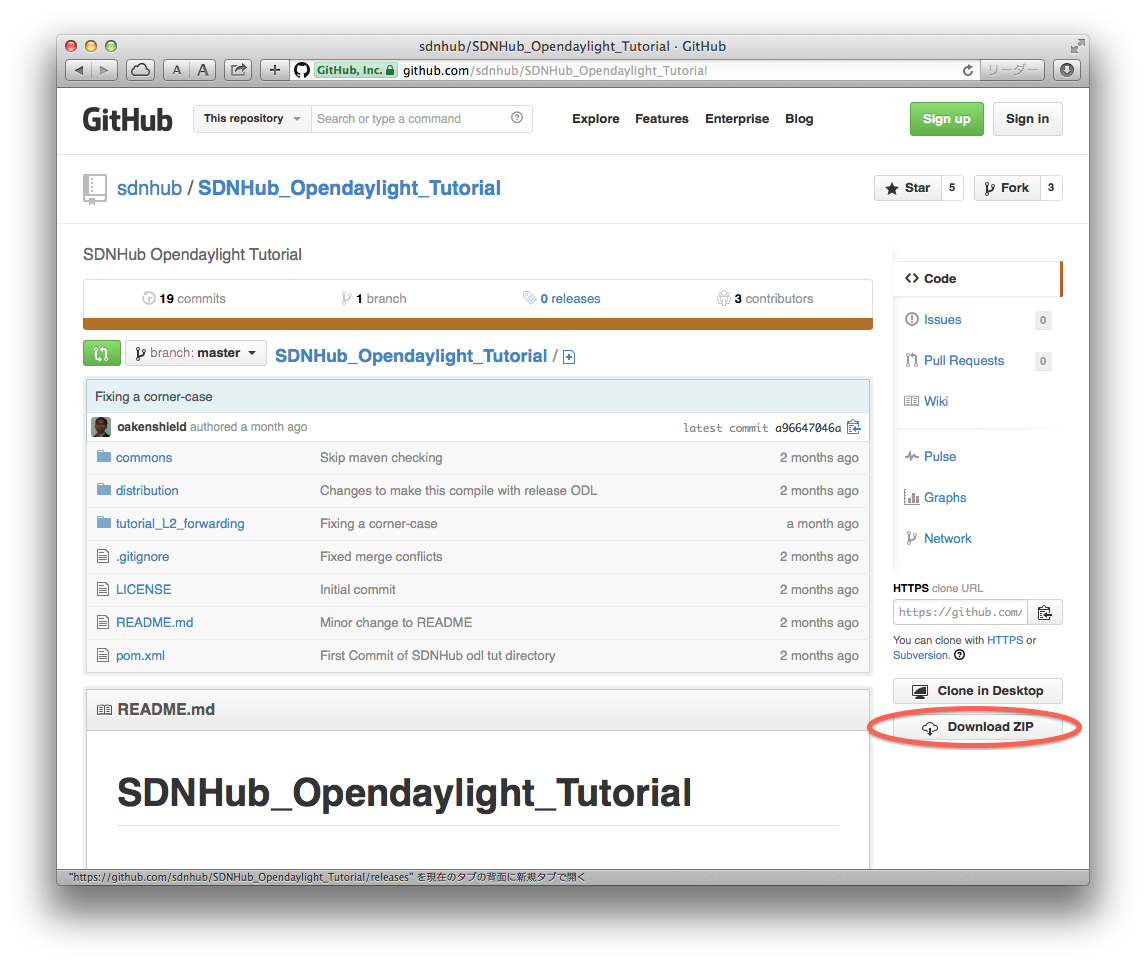
サンプルソースの取得
以下のリポジトリからサンプルプロジェクトをダウンロードします。
https://github.com/sdnhub/SDNHub_Opendaylight_Tutorial
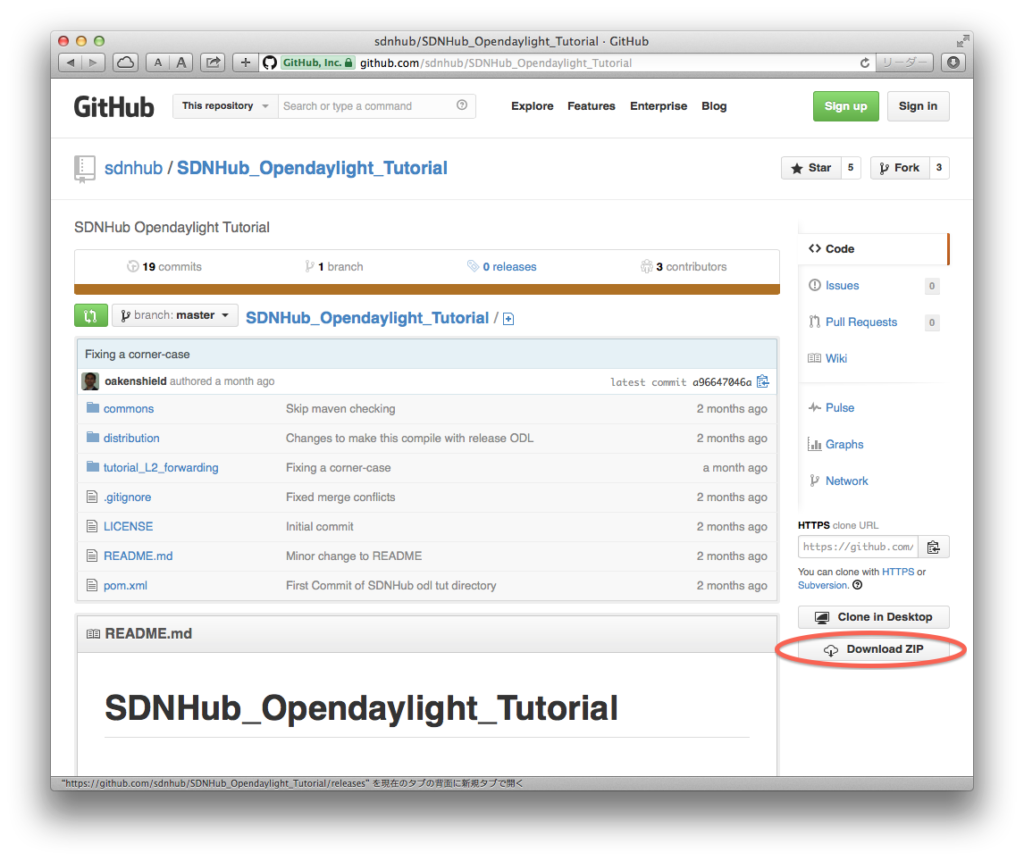
画面右の”Download ZIP”ボタンをクリックしてダウンロードします。
ビルド
ダウンロードしたファイルを解凍したら以下のディレクトリに移動し、Mavenを使ってビルドします。
SDNHub_Opendaylight_Tutorial-master/tutorial_L2_forwarding
※解凍してできたディレクトリが”SDNHub_Opendaylight_Tutorial-master/”です。
[shell]
 $ mvn package
[/shell]
※ビルドの必要環境は以下の通りです。
JDK1.7以上
Maven 3以上
ビルドしたらカレントディレクトリ配下に”target”ディレクトリができ、
その中に以下のControllerアプリができています。
target/sdnhub.tutorial_L2_forwarding-0.5.0-SNAPSHOT.jar
できたアプリをOpenDaylightのpluginsディレクトリにコピーします。
[shell]
 $ cp tutorial_L2_forwarding/target/sdnhub.tutorial_L2_forwarding-0.5.0-SNAPSHOT.jar opendaylight/plugins/
[/shell]
※上位のディレクトリパスは省略しています。
OpenDaylight起動
[shell]
$ openDaylight/run.sh
[/shell]
※これ以降、OpenDaylightのプロンプトは”osgi>”で表現します。
あらかじめ上記でビルドしたControllerを停止しておきます。
[shell]
osgi> ss tutorial
 "Framework is launched."

 id State Bundle
 214 ACTIVE org.sdnhub.tutorial_L2_forwarding.sdnhub.tutorial_L2_forwarding_0.5.0.SNAPSHOT
osgi> stop 214
 2014-04-20 22:42:05.357 JST [Gogo shell] INFO o.o.c.t.i.TutorialL2Forwarding - Stopped
osgi>
[/shell]
Mininet起動
[shell]
$ sudo mn --topo=minimal --mac --switch ovsk --controller=remote,ip=<OpenDaylightを起動しているホストのIPアドレス>
[/shell]
※これ以降、Mininetのプロンプトは”mininet>”で表現します。
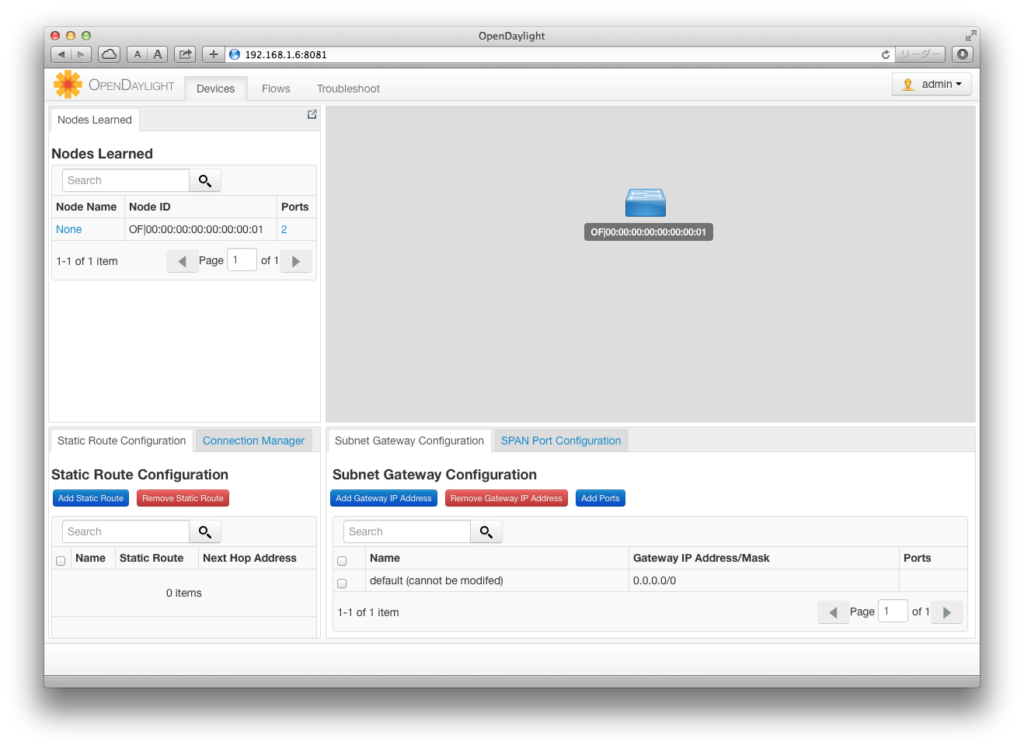
トポロジを確認します。
[shell]
mininet> net
 h1 h1-eth0:s1-eth1
 h2 h2-eth0:s1-eth2
 s1 lo: s1-eth1:h1-eth0 s1-eth2:h2-eth0
 c0
mininet>
[/shell]
一つのスイッチ(s1)に二つのホスト(h1,h2)が接続された状態です。
OpenDaylightの画面では以下のようになっています。
この状態でMininetでpingを投げてみます。
[shell]
mininet> h1 ping h2
 PING 10.0.0.2 (10.0.0.2) 56(84) bytes of data.
 From 10.0.0.1 icmp_seq=9 Destination Host Unreachable
 From 10.0.0.1 icmp_seq=10 Destination Host Unreachable
 From 10.0.0.1 icmp_seq=11 Destination Host Unreachable
[/shell]
スイッチが機能していない状態です。
OpenDaylightに配置したControllerアプリを起動
Controllerアプリを起動します。
[shell]
osgi> start 214
 2014-04-21 02:07:21.407 JST [Gogo shell] INFO o.o.c.t.i.TutorialL2Forwarding - Initialized
 2014-04-21 02:07:21.407 JST [Gogo shell] INFO o.o.c.t.i.TutorialL2Forwarding - Started
osgi>
[/shell]
mininetのプロンプトに戻ると、pingが通るようになっています。
[shell]
mininet> h1 ping h2
 PING 10.0.0.2 (10.0.0.2) 56(84) bytes of data.
 From 10.0.0.1 icmp_seq=9 Destination Host Unreachable
 From 10.0.0.1 icmp_seq=10 Destination Host Unreachable
 From 10.0.0.1 icmp_seq=11 Destination Host Unreachable
 64 bytes from 10.0.0.2: icmp_seq=12 ttl=64 time=1001 ms
 64 bytes from 10.0.0.2: icmp_seq=13 ttl=64 time=2.33 ms
 64 bytes from 10.0.0.2: icmp_seq=14 ttl=64 time=3.10 ms
 ^C
 --- 10.0.0.2 ping statistics ---
 14 packets transmitted, 3 received, +3 errors, 78% packet loss, time 13076ms
 rtt min/avg/max/mdev = 2.331/335.808/1001.990/471.061 ms, pipe 3
mininet>
[/shell]
pingが通り、ビルドしたスイッチControllerが機能したことがわかります。
次回は、今回の実験で使用したサンプルソースと、OpenDaylightやMininetコマンドの解説をしようと思います。